Distance 10.5km | Ascent 1220m | Scramble rating Grade 1-2 | Go there when the air is clear enough to enjoy the views.
The mountains of Torridon are iconic, awe inspiring, and just a little bit intimidating. Their terraced fortress-like sides appear impregnable from many angles and the thought of scrambling up them an act of lunacy. We know, though, that there are classic scrambles to be found here amongst these hills. Liathach, for example, has the reputation of being one of the finest ridgelines on mainland Britain. But it also has the reputation of being fierce, unwelcoming and wholly unsuited to the novice scrambler. Where, then, among the scoured Torridonian peaks might a scrambler – one who has cut their teeth on the Grade 1 lines of the Lake District and Snowdonia, and is looking to up their game and explore a magnificent corner of north-west Scotland – find a route suited to their abilities and ambitions?
Just north-east of Liathach, and offering unrivalled views back to it, sits Beinn Alligin. A shapely, textured hill exhibiting the tiered outer walls that are typical in this part of the world, the twin Munroed massif offers a traverse that is as airy and elevated as its neighbours, but a little less sharp and challenging. The Horns of Alligin are a trio of small summits that provide scrambling of the Grade 1-2 variety, and a bypass option for the trickiest sections. A circular route that bags both of Ben Alligin’s Munro summits, and The Horns can be taken in either direction. Anti-clockwise gets you stuck into the meat of the scrambling sooner, but a clockwise circuit offers the opportunity for some warm-up clambering, appetite-whetting views of a ridgeline walk and The Horns themselves, and the old-school motivator of saving the best ’til last. It goes like this…
1.
There’s a parking area (NG868576) on the north shore of Loch Torridon near Torridon House. Cross the road and take the path heading north-north-west towards Ben Alligin. At around the 500m contour the path enters Coire nan Laogh. Follow the path through and up the coire, or take to the southern skyline for a steep but technically straightforward Grade 1-ish scramble up Na Fasreidhnean and onto the summit plateau of Tom na Gruagaich. The trig pillar at 922m marks the summit of the first Munro.
2.
The view of the ridge to the north is a good one. Take a moment to enjoy it before dropping down, crossing the ridge, and beginning the climb north then north-east around the rim of Toll a’ Mhadaidh Mor and the black cleft of Eag Dubh to the second Munro summit of Sgurr Mor – Beinn Alligin’s highest point at 986m. Looking east, the scrambling section over The Horns is laid out enticingly ahead of you.


3.
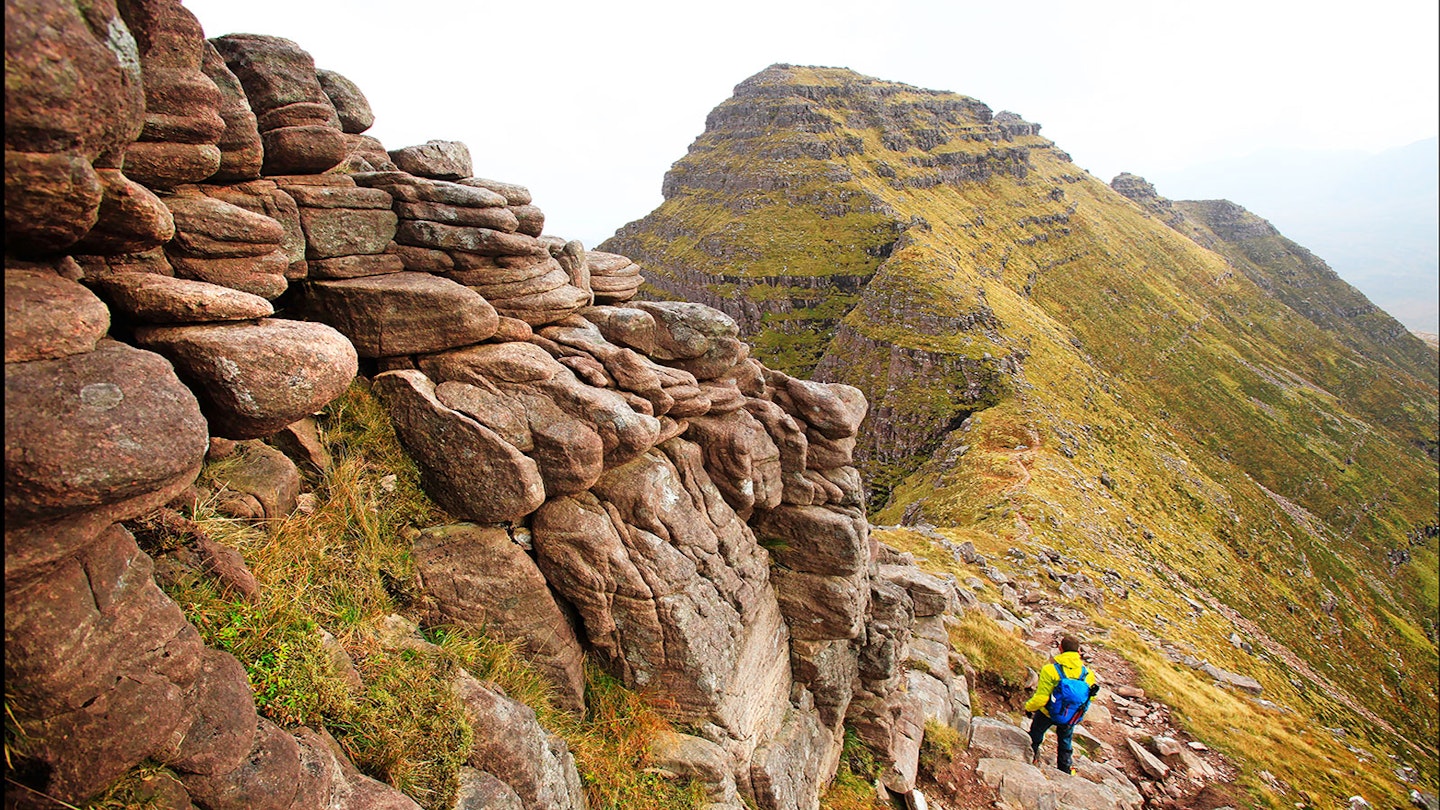
The Horns of Alligin aren’t labelled as such on OS maps, but their Gaelic title of Na Rathanan is shown, although the individual peaks remain unnamed. From Sgurr Mor drop steeply, potentially with a little down-scrambling to the bealach separating The Horns from the rest of Beinn Alligin.
4.
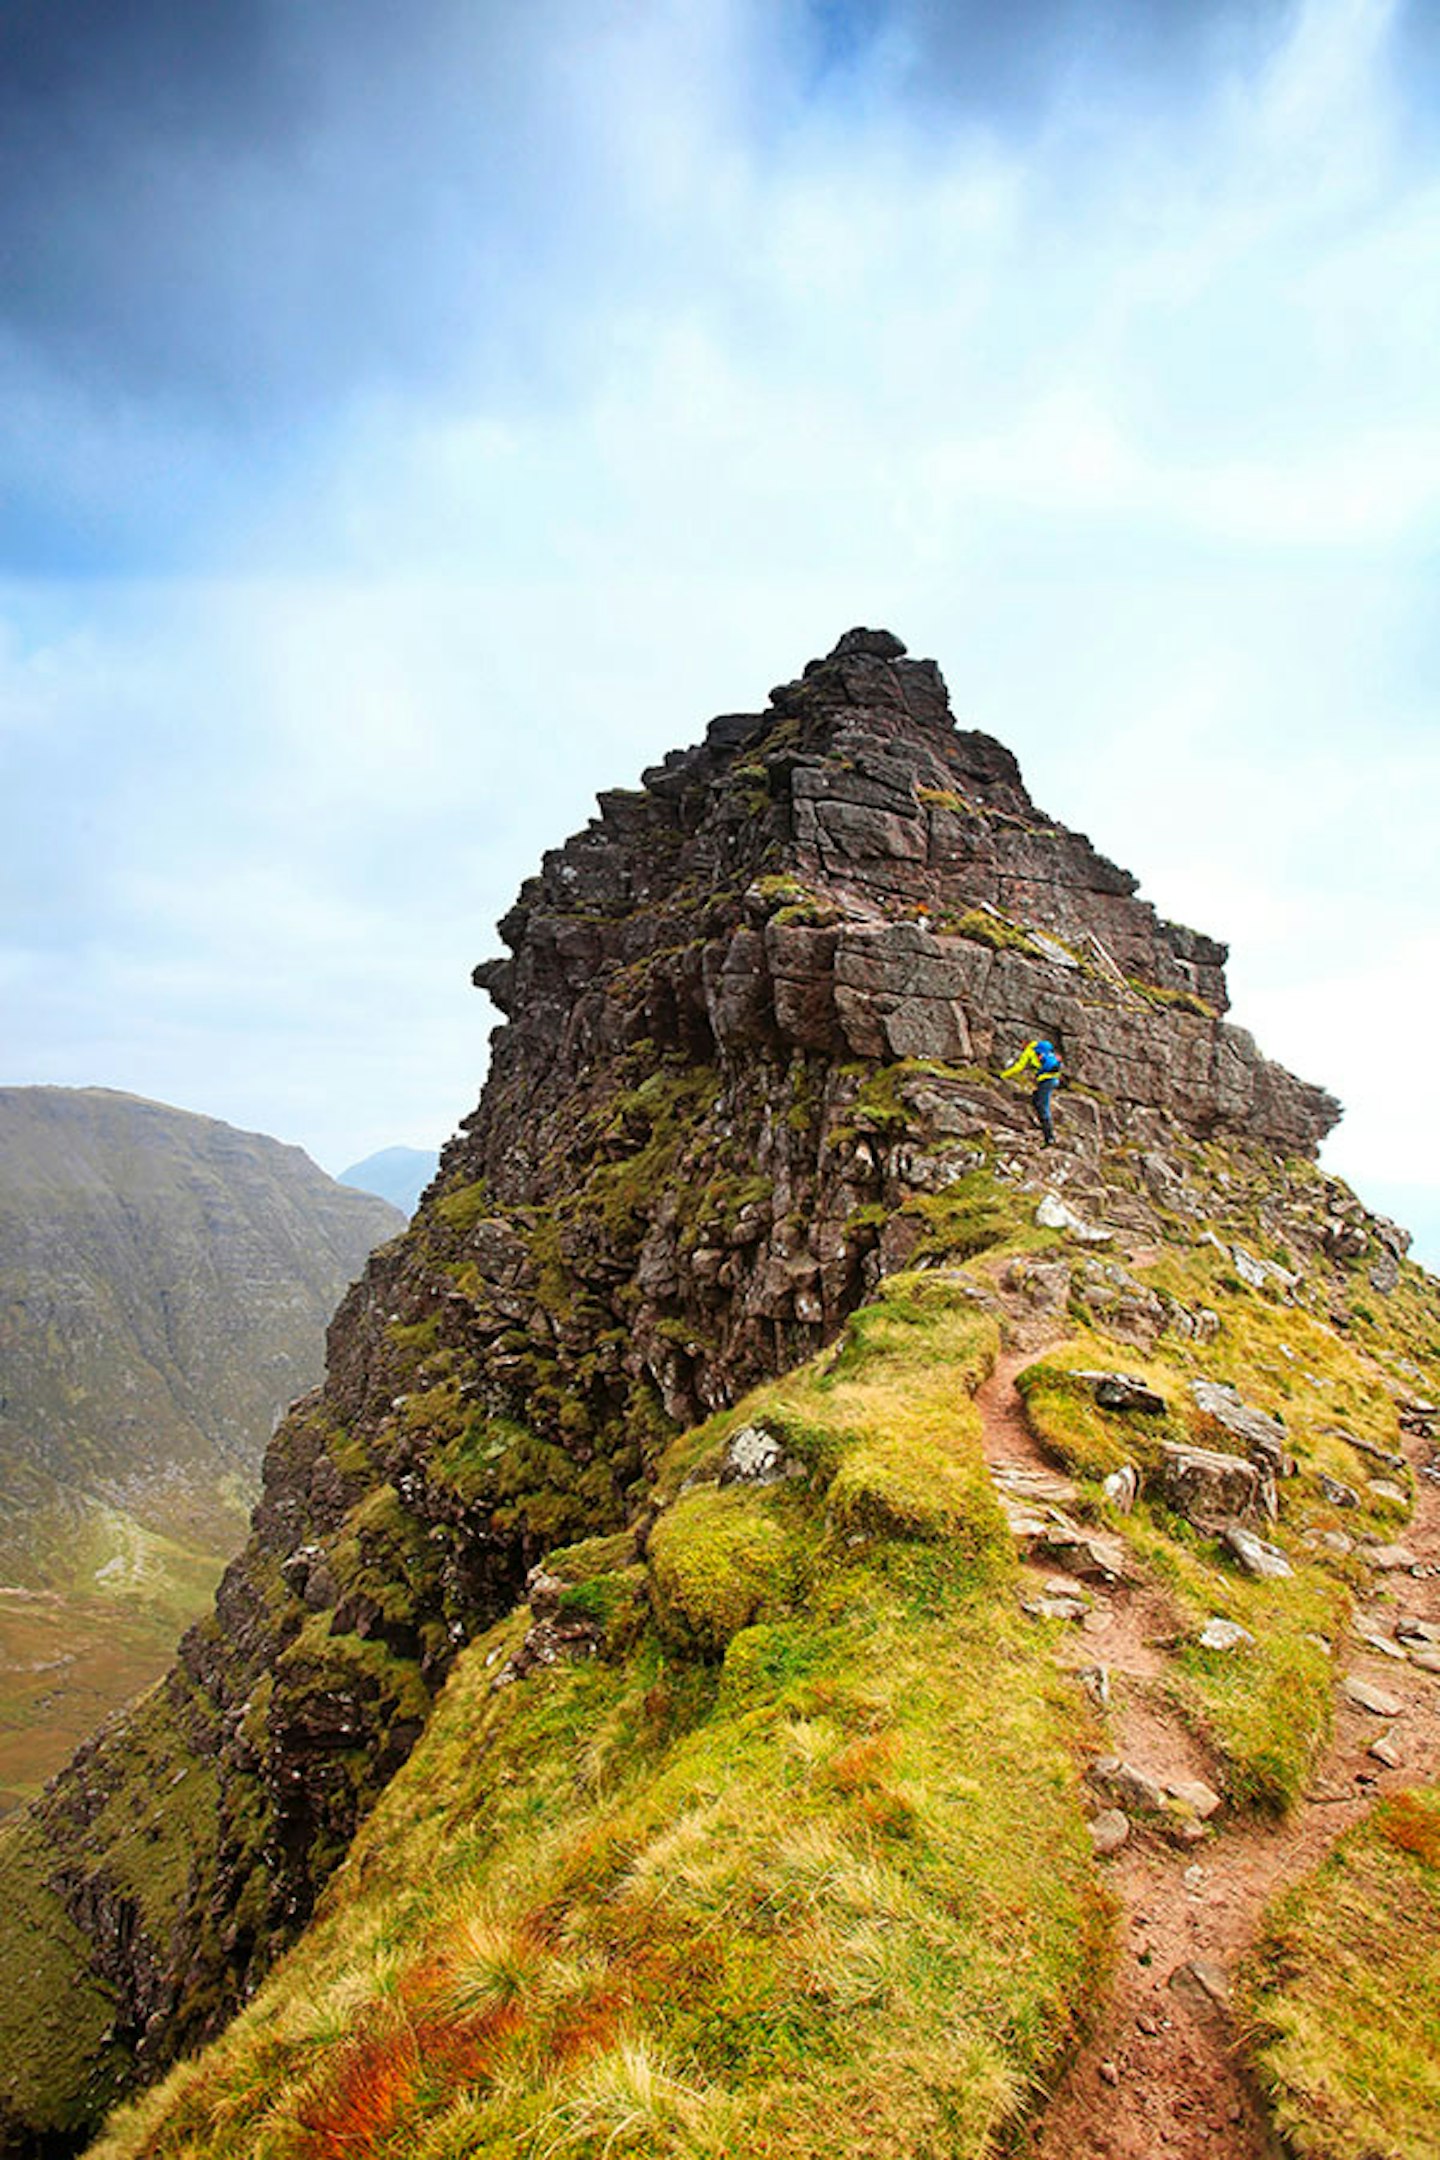
From the bealach a faint path bypasses The Horns to the south above steep and potentially slippery grass slopes. This should be avoided. It is actually safer, not to mention far more entertaining, to tackle The Horns head on. The first of the three can be relatively easily bagged via some airy but unchallenging scrambling that climbs to the summit following an obvious line of travel.
5.
The descent from Horn number one and ascent to Horn number two is straightforward enough, and a rough track can be followed up and over the latter before arriving at the notch before the final Horn.


6.
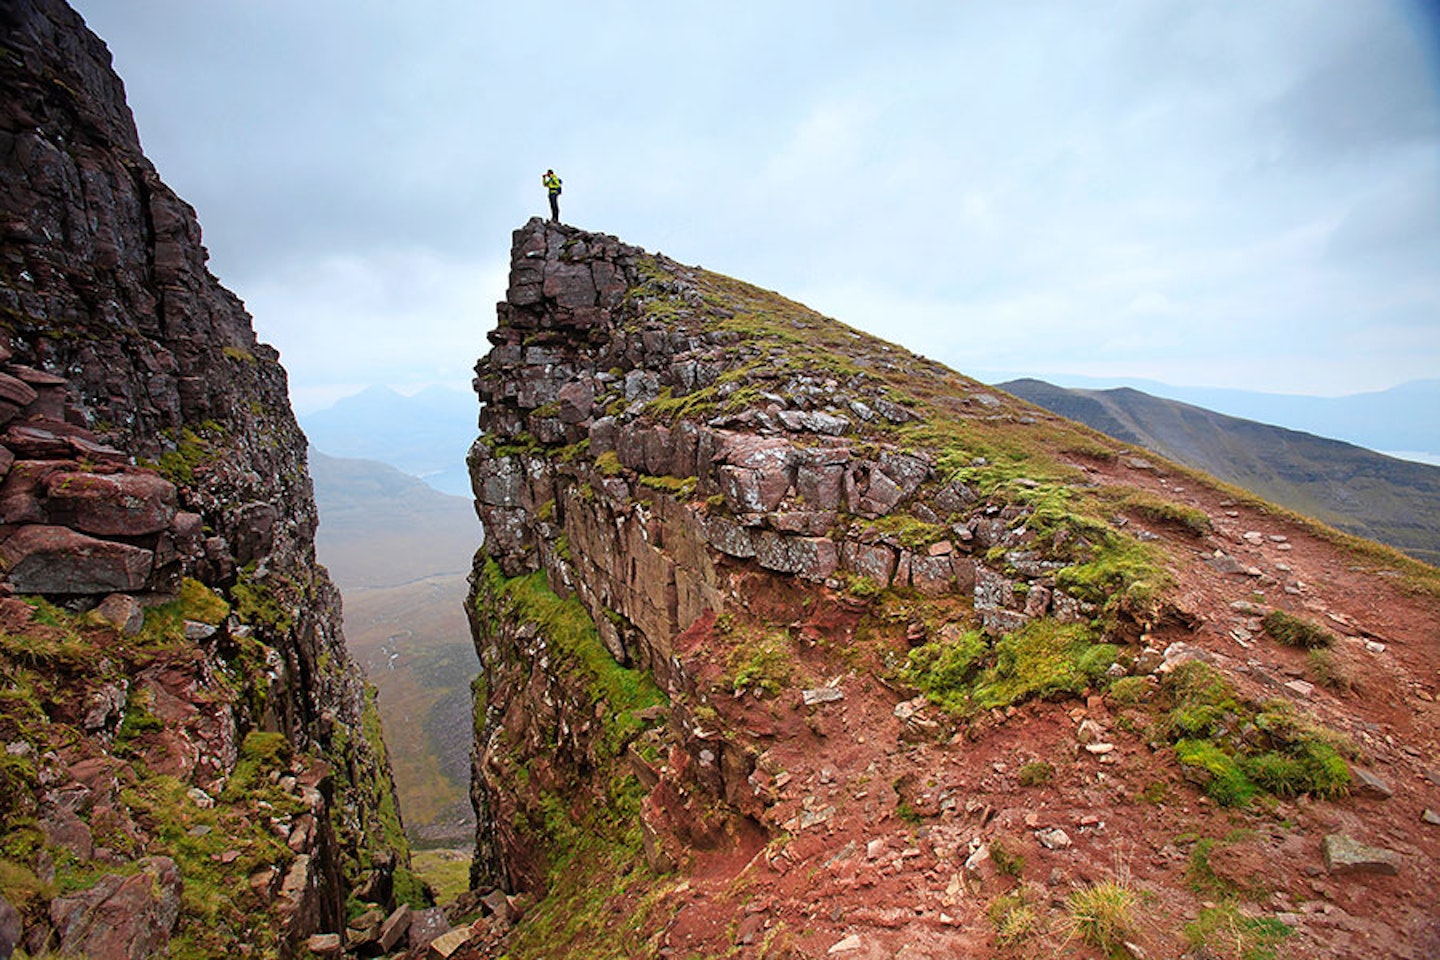
Begin the ascent of the final Horn and traverse out to the right to avoid difficult steep ground. Take care not to go too far as the drops grow big. Reclaim the ridge by tackling a short chimney back to the crest. From the top of the final Horn, the descent east should be taken carefully, following the path as it descends steeply and winds round and through the sandstone terraces.
7.
Follow the obvious track down the south-east shoulder of An t-Sail Bheg towards the Allt a’ Bhealaich stream. Where it joins another path by a cairn, turn right to head south. Cross a footbridge, pass another path junction, cross a second footbridge, then follow the path south-west back to the road and car park.

Follow this route with HALF-PRICE digital Ordnance Survey Maps for the whole of Great Britain by subscribing to Trail magazine.
